I think it only makes sense to start back at the beginning, so i chosen to discuss how to create Brick & Mortar Retail shop in well known ERP Microsoft Dynamics AX 2012 R3 for Retail. we will discuss step by step for making it more comprehensive.
1- Go to Retail > Area page> Common> Click on 'Retail Channel' here you will get 4 options (1) Retail Store, (2) Online store, (3) Online marketplace, (4) Call Center.
Out of above 4 options we need to select 'Retail Store' as this is only for Brick & Mortar retail shop and now you will get following page for your reference
Now we will discuss every field in details:
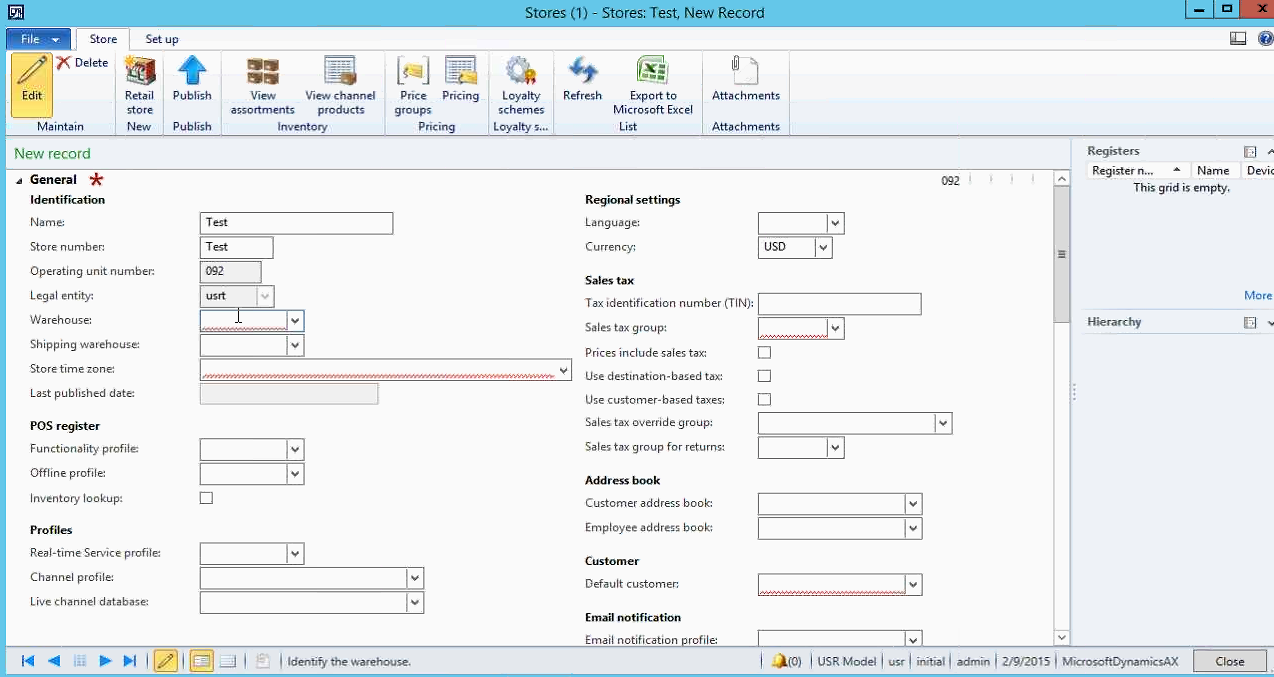 |
| New Store Creation |
Now we will discuss every field in details:
Name - Need to give retail store name.( Mandatory)
Store number- give the store no as it is manual and mandatory.
Operation unit no - This is automatic generated.
Legal entity -Need to select.
Warehouse- This is mandatory and this is for connected retail store's warehouse
Before moving ahead this is most important to learn how to create new warehouse. You can easily right click on warehouse box and select view and this will take you to another page of warehouse creation.
 |
| Warehouse creation page
Now we need to fill required details in above warehouse creation form following points are important to fill. ( This warehouse setup is only for retail operation, we will not discuss advance warehouse management)
Name, Site,Types, Quarantine Warehouse, Transit warehouse, Retail fast tab option - Location Replenishment ( weight- this is a ratio usable at the time of replenishment activity, Store- this is check/ uncheck option and need to check as this warehouse is going to use as store warehouse. Select negative inventory check/ unchecked.
After filling these details we will link this new warehouse with replenishment hierarchy which is mandatory. We will do this task later on now just continue to creation of retail channel. Shipping warehouse- just select same new warehouse. Store time zone - This field is mandatory.
Language - Most important thing to select working language.
Currency - Again important to select.
Tax identification no - As obvious in retail shop you are taking sales tax so here give your TIN NO.Sales Tax Group- We need to select sales tax group which is going to apply for transaction at this shop.
Price inclusive sales tax- Retail price of product will be inclusive of tax of exclusive of tax, need to check/unchecked.
Use destination -based tax- Use shipping address for calculation of tax, means geographical area based tax calculation.
Use customer -based tax- During the sales transaction where the customer is located on that basis tax will we be calculated.
*Note - Above last two type of tax calculation are mostly appropriate for online channel because in case of Brick and Mortar shops customer used to come to shop and tax calculation are applied on the basis of location of brick and mortar shop.
Sales tax override group- If you want to override the tax need to select the override group.
Sales Tax Return Group - Some company calculate item return tax so for that this option is given.
Customer address book and Employee Address Book - Address book for both need to select here.
Default Customer- This is mandatory fill to select default customer because system will use this default customer to generate reports.
Email notification - Instead of parameter we can specify email notification from here also.
POS Functionality profile- Here we have to decide functionality permission for POS users, if you right click on box you can see standard setup or customized setup of user created.
Offline Profile- Here we have to select what all filled need to be updated in case data gets off and back to resume.
Real time service profile- This is bit a technical stuff, related to which server or port are using to connect POS to AX. We can setup in parameter for all store or we can create separate for different -different stores.
Channel profile and Live Channel Database - This is for online stores not with Brick and mortar stores.
Statement Method- We have to select which method for statement, we can see four type of method here: 1)Staff 2)POS Terminal 3) Total 4)Shift. Need to select any one here.
Tender Declaration - Two Option will be there:
Last- Once we open a store i need to put some amount from my side as the form of the change so how will you do the tender. You can define tender declaration for each day that how much amount i have put in the tender.
Sum- It indicate multiple tender declaration for each day will be done and at the end of the day system will total how much amount i put in the tender declaration.
Rounding account - It means different between total sales amount and total payment amount will be post into this account.
Name- The name of account of this different.
Maximum Rounding Amount-Maximum different amount can be described here.
Maximum different: three situation here:
Posting- Maximum different while posting need to describe.
Shift - Maximum different while moving one shift to another shift.
Transaction- Once a transaction finished how much maximum different.
Closing Method- It is the closing method used for this specific store or by shift.
End of Business- Latest time that the last transaction can be completed to be included in this today' statement.
Post as business day- Select the post as business day check box to post the transactions within the same business day. When the statement is posted, transaction that are recorded within the same business day can be included on the same sales order, even they occur before and after midnight.
Split by Business day- If we want to post the statement on the basis of shift then select this option. first select shift option on closing method and then check split by business day box.System will take shift time which we have defined in worker shift.
Store Area- Define store area in box.
Remove/ Add Payment Method - Removing or adding money in cash drawer, we usually select cash here.
Opening Hour ( From -To) Store timing.
Print labels- If we want to create shelf labels for particular retail store need to click this box.
Product Labels - If we want to take individual product labels then select this check box.
Create labels for zero price- If some product are having zero price still for the inventory management we want to create labels need to select this check box.
PO Product Filter- Only product which are available on purchase order can be used for replenishment no any other item will be used. System will force you for cross dock because cross docking is linked with purchase order.
Financial Dimension- Need to fill financial dimension.
Screen Layout - This is most important for design the layout of our POS user interface, which need a separate discussion altogether. So here need to select one of setup option.
Now we have to link this New Retail Sh to Organisational Hierarchy for this go to organization administration>Organisation>Organisation hierarchy:

Click on Retail Store by business unit and then click on view button on the top of the page, following page will open:

Now click on edit button and following page will be open:

Now click one business unit and insert the retail store, after given required details about new retail store,we need to click on publish & close button one upper left of the page and give effective date, say close you will receive popup about effective date of publishing this retail store. Finally go to retail store list and select the new store and click on Publish button.
In my next post we will cover Action pane at Retail Store Form.
|
I just needed to thank you so much once more. I am not certain the things that I may have experienced without the sort of insights uncovered by you in regards to that circumstance.
ReplyDeleteucuz uygun yol ve kaldırım yapımı iskenderun hatay arsuz
Gyanesh Well explained thanks...
ReplyDeleteKindly Explain Opening hours field is just a information or it can effort in retail POS or on posting. Thanks